REQUIRE A BESPOKE LOOK?
We offer a custom design
service at NO extra cost.
Think you can't have that sliding wardrobe because of your wonky walls or worried that it's going to be difficult? Don't worry, we are here to make fitting your choice of sliding wardrobe doors as simple, easy & straightforward for you.
Simply follow our guidance here in addition to the installation guide supplied with your doors for a simple professional way to fit sliding wardrobe doors when you need to cater for your walls not being plumb and straight.
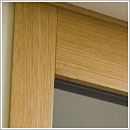
You will see in our sliding wardrobe doors installation guide we suggest using strike plates with packers behind them to create a frame that is true and square. Now we are going to show you how to obtain the most professional finish in disguising the gap that is left between the strike plate and an uneven wall and how to cope with any large gaps between wall and frame.
First things first though;
Using a plumb line will give you a good basic indication as to whether the walls are plumb and straight. However, the most accurate way is to use a spirit level placed against the wall horizontally then vertically to detect any uneven surface.
A long spirit level is best for this; however, if only a short spirit level is available, use a long length of planed timber that is perfectly straight on both sides, rest your spirit level on the surface of the timber. By using packers or thin pieces of cardboard you can then work out how much the wall is out of plumb.
Here are the best solutions according to the width of the gap to be made up between the wall surface and the strike plates or top liner:
Decorators’ caulk is used successfully by the majority of our customers to fill small surface gaps. Decorators’ caulk can be used to fill gaps between 1 - 6mm.
Please follow the manufacturer’s recommendations on how to apply decorators’ caulk. Decorators’ caulk can be painted to match the strike plate or wall colour.
For deeper gaps, eg. 1 -12mm, powder fillers can be used. This method requires the filler to be pre-mixed with water to the right consistency, be sure to apply straight away before it stiffens.
The professional way to approach larger gaps is to build up in stages. Apply the filler in two or more stages, allowing each stage to harden before the next application. Once hardened and completely dry sand it down, paint or paper over to achieve a smooth professional finish.
Before applying any type of filler we recommend that the strike plates and/or liners are masked (with masking tape and/or newspaper) to protect from the filler and subsequent sanding.
Quadrant beading or moulding can be used to cover gaps from between 1 to 20mm.
Quadrant beading is available in a number of sizes (9, 12, 16, 18 and 21mm) and is also available in a number of colours and wood finishes so choose the best colour match for your strike plate. It may be worth visiting a flooring supplier as many colour and finish options are available for use with laminate or timber floors.
If a good colour match cannot be found then select a neutral wood colour and stain it with a best match colour stain. To fix the quadrant beading use a grab adhesive such as ‘No Nails’ or similar, following the manufacturer’s instructions.
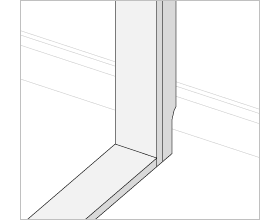
If significant differences in plumb or surface irregularities exist across the wall then an L-shaped column or fillet can be used to rectify the differences in level. Such a method can also be used to ‘bridge’ over skirting boards or ceiling coving without the need for cutting and removal. Similarly, this method can be used if there are pipes or electrical conduits running along the wall which cannot be moved. Although this method requires the most work it offers a neat and professional solution for overcoming large wall irregularities or immovable obstacles.
Creating an L-shaped column:
Measure the floor-to-ceiling height and transfer this to two strike plates.
Please note: If you decide to construct L-shaped columns using our strike plates please bear in mind the width of these columns when you provide us with your aperture width measurement. Please speak with our Design Team on Freephone 0800 035 1730 before ordering if you intend to create L-shaped columns for your sliding wardrobe doors.
You should now be confident that you can cope with any gap between the strike plates and your wonky walls and be able to produce a neat, professional & perfectly straight finish. If you would like to discuss your particular installation with the Design Team at Wardrobe Doors Direct please freephone 0800 035 1730.
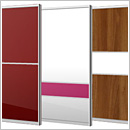
Now you can go ahead and choose your doors today.

We offer a custom design
service at NO extra cost.
Follow these simple guidelines to
get the perfect fit for your sliding
wardrobe doors.
The sliding wardrobe doors are
very easy to install so you don’t
have to be a DIY expert.
Request FREE samples to help
with the design process and
colour matching.